I’ve been a fan of HTTP and caching since my dial-up modem.
Skip to today where google returns HTTPS sites higher in its search results. Its could also be possible that you cannot trust a man in the middle HTTP cache any longer either right? :)
SSL certs have traditionally been expensive, but say welcome to lets encrypt which provides a free way of securing all of your websites. If you haven’t heard of it check it out here – https://letsencrypt.org/
As always i’ve implemented my LetsEncrypt trial via docker. The container image i have been using has been put together by the linuxserver guys – https://hub.docker.com/r/linuxserver/letsencrypt/
(i use a few of their container images, they seem legit)
This container image comes ready to roll with Nginx built in which can act as a reverse proxy to your unsecured websites at the back-end. I’ll be testing it for the next few days to see how it stacks up, but so far so good. Nginx is fast, so a good transition if only to offload all my SSL traffic. If all goes well it will be the end of my squid reverse proxy which i have used happily for many years.
In the past http had the performance, certs were too difficult (but are they?) and expensive to implement and i was a fan of my sites being cached. New times are here, SSL (TLS) rules supreme.
On another note, HTTP 1 sites are dwindling, SPDY didnt last long but apparently some of that has been built into HTTP/2 – exciting!
Check out these links for some interesting reading on performance –
https://samrueby.com/2015/01/26/why-is-https-faster-than-http/
http://www.httpvshttps.com/
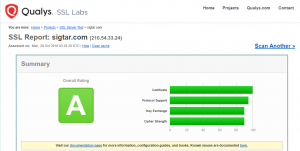
Handy link for testing if your site is using HTTP2 – https://www.ssllabs.com/ssltest/