OpenSolaris – Headless server

I’ve moved from a CentOS linux distro running vmware server 2.0 to OpenSolaris running VirtualBox. My previous system was totally headless and i wanted something similar to replace it.

I’ve just started getting into OpenSolaris for many reasons (Sun has some cool stuff – ZFS / VirtualBox). But I have always wanted to run OpenSolaris as a headless server, and from what i initially found VirtualBox didn’t have the easy to use autostart on boot features that vmware server had. But there are always ways to get things working…

OpenSolaris 2008.11 has desktop sharing (system->preferences->desktop sharing) which is half of the job — enable this.

I had issues if i used a password protected session (it kept prompting on the actual console for password to unlock the key chain), so chose not to prompt for password for now. Now every time after you have logged in you are able to connect to your machine via VNC. (veno-server)

The other half of the problem is how to have the machine automatically log on as a user on boot-up. This is easily enabled via /etc/x11/gdm/custom.conf or gdmadmin. See this post for more details on the autologon.

Updated : 26/07/2009

After a bit of playing about I’ve found another way to make opensolaris the perfect headless box. First fire up gdmsetup and enable the required remote sessions.

Go to the “Remote” tab and set the style to “same as local”, then under security ensure that “Deny TCP connections to Xserver” is not checked.

Next go into the services GUI and tick the box next to X server (x11/xvnc-inetd). Next type;

svcs | grep vnc

Disable all vnc services except the one we want to enable (below);

svcadm enable xvnc-inetd

Now to get the vnc session to remain open when you disconnect update the service with the following parameter change;

svccfg -s xvnc-inetd setprop inetd/wait = boolean: true

Reboot. Done.

You should upon reboot be able to vnc straight into the box with a session that wont reset on disconnect.
Opensolaris : Citrix XenServer / ESX – Hooking into ZFS

To share your zfs pool via NFS (that works with Citrix Xen / ESX) to a host called “esxhost”;

zfs set sharenfs=rw,nosuid,root=esxhost tank/nfs

Note : You MUST have a resolvable name from the opensolaris box. i.e. you should be able to ping it. I have tried with ip’s only and it will fail. I have edited the /etc/hosts file to include the following line for my config;

# Copyright 2007 Sun Microsystems, Inc. All rights reserved.
# Use is subject to license terms.
#
# ident “%Z%%M% %I% %E% SMI”
#
# Internet host table
#
192.168.9.120 esxhost

This also requires that you are using both DNS and Files in your /etc/nsswitch.conf file. You should have a line like so;

# You must also set up the /etc/resolv.conf file for DNS name
# server lookup. See resolv.conf(4). For lookup via mdns
# svc:/network/dns/multicast:default must also be enabled. See mdnsd(1M)
hosts: files dns mdns

# Note that IPv4 addresses are searched for in all of the ipnodes databases
# before searching the hosts databases.
ipnodes: files dns mdns

i’ve also run this before hand; (to allow full access)

chmod -R 777 /tank/nfs

Update : check this guide http://blog.laspina.ca/ubiquitous/running-zfs-over-nfs-as-a-vmware-store

Update 2: there are known issues with waiting for sync when using both NFS and ZFS together…. There are reasons why you shouldnt do this, but in a test enviornemnt disabling sync at ZFS level may help performance (zfs set sync=disabled)

I like this idea of spliting up your SSD too… again in test enviornment no problems, in production i would utilize the entire drive to the tasks https://blogs.oracle.com/ds/entry/make_the_most_of_your

opensolaris / zfs – whitebox build

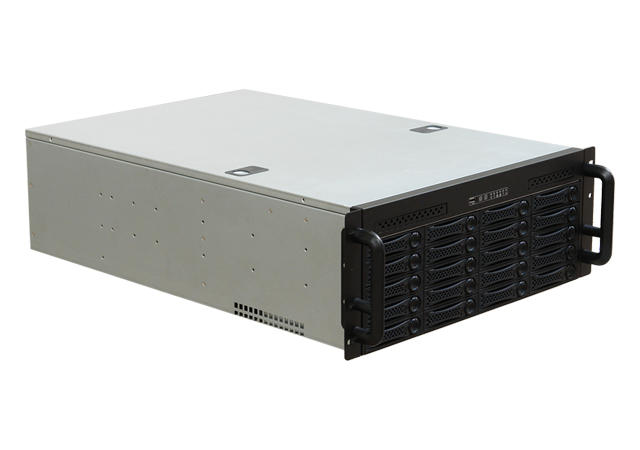
I’ve built a little server for home use, but it pales in comparison to this beast… This type of setup would be perfect for a lab / test environment that requires lots of fast and reliable disk. SCSI drives are fading out, SATA can perform if its setup right. When you look at the price of the entire build you wonder why corporations continue to spend the big bucks on the big storage names.

Check out this build (very nice clear guide)   http://www.stringliterals.com/?p=77

rpc-4020b (1)

Awesome piece of work.

zfs – playing with various configs

If you dont have the disks available to build up a zpool and have a play with zfs you can actually just use files created with the mkfile command… The commands are exactly the same.

mkfile 64m disk1

mkfile 64m disk2

mkfile 64m disk3

mkfile 10m disk4

mkfile 100m disk5

mkfile 100m disk6

Now you can create a zpool using the above files… (i’m using raidz for this setup)

zpool create test raidz /fullpath/disk1 /fullpath/disk2 /fullpath/disk3

if you now want to expand this pool using another three drives (files) you can run this command

zpool add test raidz /fullpath/disk4 /fullpath/disk5 /fullpath/disk6

Check the status of the zpool

zpool status test

NAME STATE READ WRITE CKSUM

test ONLINE 0 0 0
raidz1 ONLINE 0 0 0
/export/home/daz/disk1 ONLINE 0 0 0
/export/home/daz/disk2 ONLINE 0 0 0
/export/home/daz/disk3 ONLINE 0 0 0
raidz1 ONLINE 0 0 0
/export/home/daz/disk4 ONLINE 0 0 0
/export/home/daz/disk5 ONLINE 0 0 0
/export/home/daz/disk6 ONLINE 0 0 0

errors: No known data errors


Now time to replace a drive (perhaps you wish to slowly increase your space) Note: all drives in that particular raidz pool need to be replaced with larger drives before the additional space is shown.

mkfile 200m disk7

mkfile 200m disk8

mkfile 200m disk9

Check the size of the zpool first;

zpool list test

NAME SIZE USED AVAIL CAP HEALTH ALTROOT
test 464M 349M 115M 75% ONLINE –

Now replace all of the smaller drives with the larger ones…

zpool replace test /export/home/daz/disk1 /export/home/daz/disk7
zpool replace test /export/home/daz/disk2 /export/home/daz/disk8
zpool replace test /export/home/daz/disk3 /export/home/daz/disk9

The space will show up if you bounce the box, i’ve heard that sometimes you may need to export and import but i’ve never had to do that.

opensolaris – jumbo frames

If your keen on enabling jumbo frames in opensolaris this is the way…

http://docs.sun.com/app/docs/doc/819-6990/gdyqk?l=en&a=view

# dladm show-phys
LINK       MEDIA        STATE     SPEED     DUPLEX     DEVICE
net0       ether        up        100Mb     full       bge0
itops1     ether        up        100Mb     full       qfe3
web1       ether        up        100Mb     full       bge1
# dladm show-linkprop -p mtu web1
LINK     PROPERTY     VALUE     DEFAULT     POSSIBLE
web1     mtu          1500      1500        —
# ifconfig web1 unplumb
# dladm set-linkprop -p mtu=9000 web1
# ifconfig web1 plumb 10.10.1.2/24 up
# dladm show-link web1
LINK     CLASS     MTU      STATE     OVER
web1     phys      9000     up        —
dladm show-phys
LINK       MEDIA        STATE     SPEED     DUPLEX     DEVICE
net0       ether        up        100Mb     full       bge0
itops1     ether        up        100Mb     full       qfe3
web1       ether        up        100Mb     full       bge1

dladm show-linkprop -p mtu web1
LINK     PROPERTY     VALUE     DEFAULT     POSSIBLE
web1     mtu          1500      1500        —

ifconfig web1 unplumb
dladm set-linkprop -p mtu=9000 web1
ifconfig web1 plumb 10.10.1.2/24 up

dladm show-link web1
LINK     CLASS     MTU      STATE     OVER
web1     phys      9000     up        —
Done.
Note: this is not something that i would recommend or currently use. I prefer trunking two nics to give additional performance. https://sigtar.com/2009/07/20/opensolaris-network-teaming/